
Laundry rooms tend to accumulate clutter faster than any other space in the house, detergent bottles, lint rollers, stain removers, and orphaned socks all compete for limited counter space. A well-designed washer and dryer cabinet transforms chaos into functional storage while keeping appliances accessible and the room looking intentional. Whether working with a cramped closet or a dedicated laundry area, a cabinet system can hide supplies, create folding surfaces, and even incorporate hanging rods for air-drying delicates. This guide walks through cabinet types, selection criteria, and a practical DIY build that turns wasted vertical space into organized storage.
Table of Contents
ToggleKey Takeaways
- A well-designed washer dryer cabinet captures wasted vertical space above appliances, adding functional storage and folding surfaces while keeping supplies organized and accessible.
- Choose between built-in cabinets for permanent installations or freestanding units for renters, ensuring materials like 3/4-inch plywood or moisture-resistant melamine are selected based on your laundry room environment.
- Proper ventilation with a 4-inch vent hole is essential to prevent mold and humidity buildup in washer dryer cabinet designs, especially in enclosed or stacked configurations.
- Secure overhead cabinets directly to wall studs using 2.5-inch lag screws and anti-tip brackets to ensure safety and prevent sagging over time.
- Maximize functionality by incorporating task lighting, pull-out shelves, tilt-out hampers, and adjustable shelving rated for 50+ pounds to streamline your laundry routine and prevent clutter accumulation.
Why Every Laundry Room Needs a Washer Dryer Cabinet
Most laundry setups leave 18–24 inches of wasted vertical space above front-loaders or stacked units. A cabinet for washer and dryer captures that dead zone, adding storage where it’s needed most, right at the point of use.
Functional benefits include:
- Concealed storage for bulk detergent, dryer sheets, and cleaning supplies that would otherwise sit on appliances or crowd shelves
- Integrated countertops for folding, sorting, or pre-treating stains without commandeering the kitchen island
- Humidity protection through ventilated cabinet backs that prevent moisture buildup from dryer exhaust
- Noise dampening when cabinets use 3/4-inch plywood or MDF instead of thin particleboard
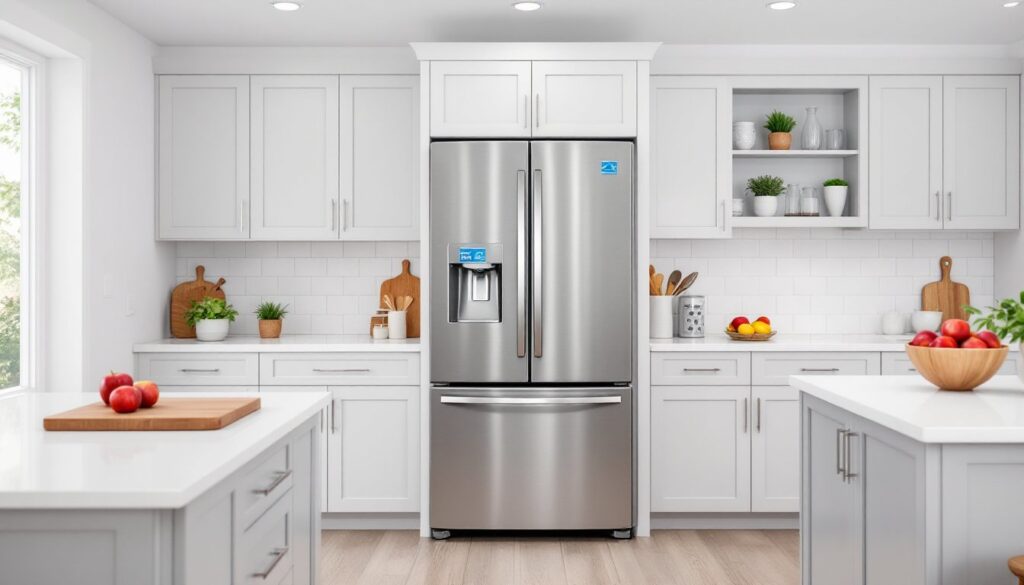
Beyond organization, cabinets also protect appliance tops from scratches, spills, and the inevitable detergent drips that glue lint to surfaces. For renters or homes with appliances in high-visibility areas (hallways, kitchens), a cabinet façade creates a cohesive look that blends machines into surrounding cabinetry. Installing washer and dryer inside a tall cabinet configuration works especially well in compact spaces where floor area is tight but ceiling height allows for vertical stacking.
Types of Washer Dryer Cabinets to Consider
Cabinet styles vary based on layout, budget, and whether the homeowner plans to move appliances in the future. Each type has trade-offs in installation complexity and flexibility.
Built-In vs. Freestanding Cabinet Options
Built-in cabinets attach directly to wall studs using French cleats or lag screws into blocking. They handle heavier loads, think gallon jugs of detergent or hampers on upper shelves, and can incorporate custom features like pull-out ironing boards or tilt-out hampers. Expect to use 3/4-inch plywood for sides and backs, with face frames from 1×2 or 1×3 poplar. Built-ins typically require cutting into drywall to anchor securely, so renters should skip this route.
Freestanding units rest on leveling feet or casters and don’t attach to walls, making them ideal for rental properties or homes where appliance locations might change. Many use a cabinet shell that surrounds top-load washers, with bifold doors or sliding panels for access. Material choices lean toward lighter MDF or melamine to avoid tipping: always anchor tall freestanding units to studs with anti-tip brackets per the same principles that secure bookcases.
Hybrid systems combine base cabinets flanking appliances with an overhead bridge cabinet. This three-piece approach works well when machines can’t be stacked due to top-load designs or if users want side storage for hampers and a countertop above front-loaders.
Materials matter: melamine-coated particleboard resists moisture and wipes clean but can sag under heavy loads spanning more than 30 inches without center support. Plywood with semigloss paint handles humidity better and supports adjustable shelving without deflection. Avoid raw MDF in high-moisture environments unless edges are sealed with oil primer, it swells like a sponge if water finds an unsealed cut.
How to Choose the Right Cabinet for Your Space
Measure twice, order once. Start with appliance dimensions, front-loaders typically measure 27 inches wide, 39 inches tall, and 32–34 inches deep, while top-loaders often reach 43–44 inches in height. Add 6 inches to depth for hoses, venting, and airflow: cramming machines flush to a cabinet back kinks supply lines and restricts dryer exhaust.
Key measurements to record:
- Door swing clearance: Front-loaders need 20–22 inches in front to fully open. Side-by-side configurations demand at least 54 inches of wall width (two 27-inch machines), but 60 inches allows for small filler panels that hide gaps.
- Ceiling height: Stacked units reach 75–78 inches: add another 12–18 inches for an overhead cabinet, bringing total height near 90 inches. Standard 8-foot ceilings leave just 6 inches for cabinet depth, doable but tight.
- Electrical and plumbing access: Cabinets must allow service panels or hoses to be reached without disassembly. Use removable back panels or leave the bottom 12 inches open.
Ventilation is non-negotiable. Dryers expel hot, moist air: trapping it behind closed cabinet doors invites mold. Cut a 4-inch vent hole through the cabinet back aligned with the dryer outlet, or use louvered doors on enclosed designs. Gas dryers require rigid metal venting and clearances per manufacturer specs, never flexible plastic duct, which violates most codes and poses fire risk.
Weight capacity determines shelf design. Detergent jugs, fabric softener, and cleaning supplies easily add 40–60 pounds per shelf. Use 3/4-inch plywood shelves spanning no more than 32 inches between supports, or add a center cleat screwed to the cabinet back. Adjustable shelf pins rated for 50+ pounds per pair work better than wire grid shelving, which sags and tips bottles.
For those renovating kitchens alongside laundry areas, many kitchen design resources offer cabinetry principles that translate directly to laundry setups, particularly around material selection and hardware.
DIY Washer Dryer Cabinet: Step-by-Step Building Guide
This build creates an overhead cabinet spanning two side-by-side front-loaders, with a folding countertop below. It assumes basic carpentry skills, a miter saw or circular saw, and access to wall studs for mounting.
Materials and Tools You’ll Need
Materials list:
- Two 4×8 sheets of 3/4-inch cabinet-grade plywood (birch or maple veneer)
- One 4×8 sheet of 1/4-inch plywood for cabinet back
- 8 linear feet of 1×2 poplar for face frame
- Wood glue, 1-1/4-inch brad nails, 2-1/2-inch pocket screws
- Adjustable shelf pins (eight per cabinet)
- Primer and semigloss paint (1 quart each: semigloss resists humidity)
- Cabinet hinges (European soft-close recommended) and pulls
- 2-1/2-inch lag screws and washers for stud mounting
Tools required:
- Miter saw or circular saw with edge guide
- Drill/driver with countersink bit and 3/8-inch Forstner bit (for shelf pin holes)
- Pocket hole jig (Kreg or similar)
- Level (48-inch preferred), tape measure, speed square
- Safety gear: goggles, ear protection, dust mask
Step-by-step assembly:
1. Cut plywood components. Rip the cabinet sides to 12 inches wide × 30 inches tall. Cut the top and bottom to 60 inches long × 12 inches deep (this spans two 27-inch machines with 6-inch gaps). Use a circular saw with a straight-edge clamp if working solo: a miter saw gives cleaner crosscuts but won’t rip full sheets.
2. Drill shelf pin holes. Mark holes every 2 inches along the inside faces of side panels, starting 3 inches from the bottom. Use a 3/8-inch Forstner bit set to 1/2-inch depth: tape on the bit shank acts as a stop to prevent drilling through. A pegboard template ensures hole alignment.
3. Assemble the cabinet box. Apply wood glue to mating edges, then join sides to top and bottom using 1-1/4-inch brad nails every 6 inches. Clamp until glue sets (20 minutes). Square the assembly by measuring diagonals, they should match within 1/8 inch. Attach the 1/4-inch plywood back with brads: this squares and stiffens the box.
4. Build and attach the face frame. Cut 1×2 poplar into rails (horizontal) and stiles (vertical). Join corners with pocket screws (two per joint), then glue and nail the frame to the cabinet front. Sand face frame edges flush with plywood using 120-grit paper.
5. Mount to wall studs. Locate studs 16 or 24 inches on center using a stud finder. Mark the cabinet height (typically 12–18 inches above appliance tops to allow door clearance). Drill pilot holes through the cabinet back into studs, then drive 2-1/2-inch lag screws with washers. Use shims behind the cabinet if the wall isn’t plumb. Do not skip this step, unsecured overhead cabinets become battering rams during earthquakes or if children climb.
6. Finish and install hardware. Prime all surfaces (including the back to prevent moisture warp), then apply two coats of semigloss paint. Install hinges 3 inches from top and bottom edges: soft-close models prevent slamming that loosens screws over time. Add pulls or knobs, consider oversize D-pulls if users will have wet hands.
Permitting and code notes: Most jurisdictions don’t require permits for non-structural cabinetry, but if the build includes new electrical outlets (e.g., for overhead lighting), hire a licensed electrician. The National Electrical Code (NEC) requires GFCI protection for receptacles within 6 feet of sinks or washing machines.
Design Tips for Maximizing Cabinet Functionality
Smart design choices turn a basic washer and dryer cabinet into a workhorse that simplifies laundry routines and reclaims floor space.
Incorporate task lighting. Overhead cabinets shadow appliance controls and folding surfaces. Install LED strip lights along the cabinet’s underside, wired to a wall switch or motion sensor. Daylight-temperature LEDs (5000K) render stain colors accurately when pretreating.
Add pull-out features. A pull-out shelf below the cabinet holds detergent and fabric softener at eye level without requiring a step stool. Use full-extension drawer slides rated for 75–100 pounds: soft-close models prevent spills from sudden stops. For narrow gaps between appliances and walls, a 6-inch pull-out with vertical dividers stores spray bottles and dryer sheets.
Plan for hamper storage. Many designs waste the 12–15 inches between the appliance tops and cabinet bottom. Install a tilt-out hamper using piano hinges on a false front, or hang canvas sorters from hooks screwed into the cabinet underside. Dual hampers (lights and darks) speed sorting.
Use vertical dividers for brooms and irons. Cut 1/4-inch plywood dividers spaced 3 inches apart, creating slots that hold flat items upright. This prevents the tangle of cords and handles common in wide-open shelves.
Ventilate enclosed designs. If cabinets fully surround appliances (common with stacked units), cut 4-inch holes top and bottom on opposing sides to create airflow. Dryer heat accelerates mold growth in sealed compartments. Louvered doors work but reduce storage visibility: many home design platforms showcase perforated metal inserts that ventilate while maintaining a finished look.
Consider countertop material. Laminate over 3/4-inch particleboard costs $30–50 for a 60-inch span and wipes clean, but seams trap lint. A single piece of butcher block runs $120–180 and tolerates hot items set directly on the surface, useful if ironing nearby. Avoid tile: grout lines collect dryer lint and detergent residue.
Label shelves and bins. Even in organized cabinets, family members default to leaving items on appliance tops. Adhesive labels or a label maker paired with clear bins reduce the “where does this go?” confusion that undoes good design.
Washer and dryer cabinets aren’t one-size-fits-all, but a thoughtful build tailored to the space and workflow can make laundry less of a chore and more of a streamlined process. Measure carefully, invest in solid materials, and don’t skip the mounting hardware, a well-anchored cabinet will serve the household for years without sagging or tipping.