
Installing an electric water heater isn’t rocket science, but it’s not exactly plug-and-play either. You’re dealing with 240-volt wiring, pressurized water lines, and local codes that can trip up even experienced DIYers. A clear installation diagram is your best friend here, it maps out every connection, component, and critical measurement before you pick up a wrench. This guide breaks down the visual roadmap for a safe, code-compliant installation, whether you’re replacing a failing unit or upgrading to a larger tank. You’ll see what goes where, why it matters, and when to call in a pro.
Table of Contents
ToggleKey Takeaways
- An electric water heater installation diagram maps every connection, component, and critical measurement needed to ensure a safe, code-compliant installation.
- Dielectric unions must be installed between dissimilar metals (copper to steel) to prevent galvanic corrosion on both inlet and outlet connections.
- Electric water heaters require a dedicated 240-volt, 30-amp circuit with 10-gauge wire, with both black and white conductors serving as hot leads that must be properly labeled and bonded.
- The temperature and pressure relief (T&P) valve discharge pipe must run unsupported to within 6 inches of the floor with no threads, caps, or valves, terminating in a visible location where scalding water causes no injury.
- A closed-system water heater with a backflow preventer requires an expansion tank mounted on the cold supply line to prevent dangerous pressure buildup and T&P valve failure.
- Most water heater installation failures stem from undersized electrical wire, reversed hot and cold connections, skipped expansion tanks, or forgotten power shutoff before filling—all preventable with proper diagram guidance.
Understanding Electric Water Heater Components and Connections
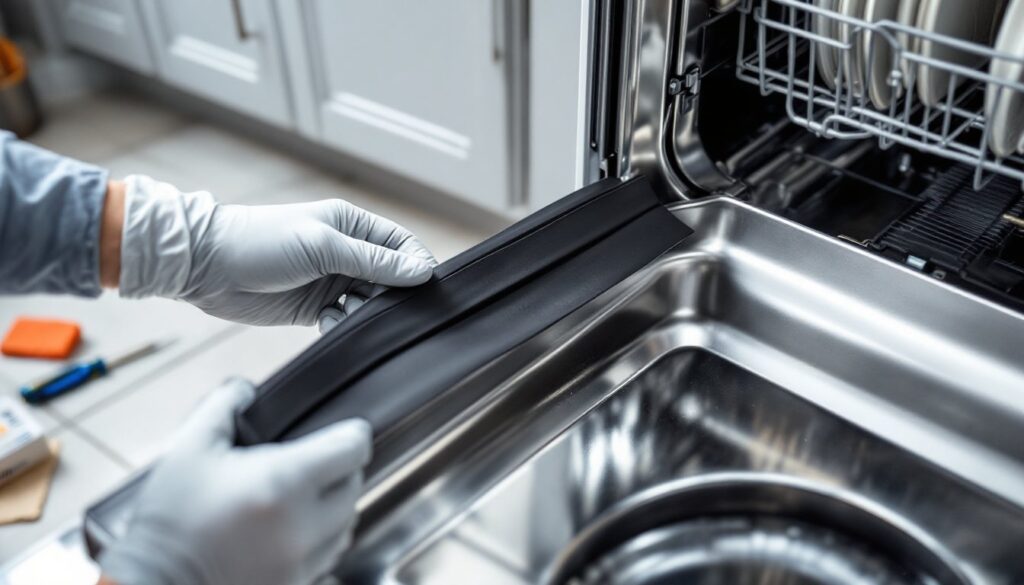
An electric water heater diagram reveals several key parts working together. At the top sits the cold water inlet with a shutoff valve, this is where municipal or well water enters. Directly opposite, the hot water outlet feeds your home’s fixtures. Both connections typically use 3/4-inch threaded fittings and require dielectric unions to prevent galvanic corrosion between dissimilar metals.
Inside the tank, you’ll find two heating elements (upper and lower on most residential units) controlled by separate thermostats. Unlike gas models that vent combustion byproducts, electric heaters are sealed systems, no flue, no vent pipe. The electrical junction box mounts on top or side of the tank, housing wire connections behind a removable cover plate.
The temperature and pressure relief (T&P) valve is your safety backstop. It’s threaded into the side near the top, designed to open if water exceeds 150°F or 150 psi. A discharge pipe runs from this valve down to within 6 inches of the floor, terminating where hot water won’t cause injury if released.
The drain valve at the tank’s base allows you to flush sediment annually and empty the unit for removal. Most diagrams show a drip pan underneath the entire heater, required in many jurisdictions when the unit sits above finished living space or in an attic.
Essential Tools and Materials for Installation
Gather everything before you start. Missing a $3 part means an extra trip to the supply house while your household goes without hot water.
Tools you’ll need:
- Adjustable wrenches (10-inch and 14-inch)
- Pipe wrench or large channel locks for 3/4-inch connections
- Tubing cutter (if working with copper) or PEX cutter
- Voltage tester (non-contact models work, but a multimeter is better)
- Pipe thread sealant or Teflon tape
- Screwdrivers (flathead and Phillips)
- Level (2-foot or longer)
- Shop vacuum (for draining old unit)
Materials checklist:
- Dielectric unions (two, unless using PEX or CPVC throughout)
- T&P relief valve (if not included with new heater)
- Discharge pipe (3/4-inch CPVC or copper, length varies)
- Water supply lines (flexible or rigid, depending on local code)
- Electrical wire (typically 10/2 NM-B Romex for 30-amp circuit)
- Wire connectors rated for the gauge you’re using
- Drip pan sized to your heater’s diameter
- Expansion tank (required in closed systems with backflow preventers)
Some jurisdictions mandate specific upgrades during replacement, seismic straps in earthquake zones, pan drains piped to exterior, or upgraded circuit breakers. Check local amendments to the International Residential Code (IRC) before buying materials.
Step-by-Step Installation Diagram Breakdown
A comprehensive water heater installation diagram walks you through positioning, connections, and testing in logical order. Start by confirming the new unit fits your space, measure height, diameter, and clearances. Most codes require 6 inches from combustible walls even for electric models.
Position the drip pan first, then slide the heater into place. Use a level on two sides: an unlevel tank can stress fittings and cause premature failure. If your floor slopes, use composite shims (never wood, it compresses and rots).
Electrical Wiring Connections Explained
Electric water heaters run on 240-volt, single-phase power, typically a dedicated 30-amp circuit with 10-gauge wire, though some larger units (80+ gallons) may need 40 amps and 8-gauge wire. Check the heater’s nameplate for exact requirements.
Turn off power at the breaker and verify it’s dead with a voltage tester. Remove the junction box cover on the heater. You’ll see three connection points: two hot leads (often labeled L1 and L2) and a ground screw.
Your incoming cable has three conductors: black (hot), white (hot, yes, both are hot on 240V circuits), and bare copper (ground). Connect black to one hot terminal, white to the other, and bare ground to the green screw. The white wire should be marked with black tape or paint near both ends to indicate it’s hot, not neutral.
Secure the cable with the provided strain relief clamp where it enters the junction box. Detailed instructions with diagrams show torque specs for terminal screws, undertightening causes arcing and fire risk, overtightening cracks the terminals.
Plumbing Connections and Water Lines
Cold water enters at the inlet marked with blue or stamped “COLD.” Hot exits from the outlet marked red or “HOT.” Don’t reverse these, it won’t work and you’ll feel foolish.
If you’re connecting copper to steel tank fittings, dielectric unions prevent electrolytic corrosion. Thread the steel half onto the tank with pipe dope (not tape, which can leave strands in the water). Solder the copper half separately, then join them with the union nut. Flexible copper or braided stainless connectors are easier but check local codes, some jurisdictions prohibit them.
Install shutoff valves on both hot and cold lines if they’re not already present. The cold-side valve is essential for maintenance: the hot-side valve is less critical but handy.
Thread the T&P valve into its designated opening (hand-tight plus 1.5 turns with a wrench). Attach the discharge pipe pointing down, no threads, no caps, no valves on this line. It must terminate in a visible location where scalding water won’t injure anyone: floor drain, outside, or utility sink.
If your system has a backflow preventer or pressure-reducing valve, you’ve created a “closed system” where thermal expansion has nowhere to go. An expansion tank mounted on the cold supply line prevents pressure spikes that can blow the T&P valve or stress fittings. Size it to match your water heater capacity and incoming pressure.
Safety Features and Code Requirements
Electric water heaters have fewer code hurdles than gas models, no combustion air, no venting, but you still need to hit several marks.
National Electrical Code (NEC) Article 422.13 requires a disconnect within sight of the appliance or a lockable breaker. Most inspectors accept the main panel breaker if it’s in the same room and lockable with an inexpensive device.
The T&P valve discharge pipe can’t reduce in size, thread into drainage, or include traps or valves. Many diagrams show it terminating 6–24 inches above a floor drain or outside wall penetration. Professionals following installation guidelines often use CPVC for this pipe, it’s rated for hot water and won’t corrode.
Drip pans are mandatory when heaters sit above living spaces, in attics, or over finished floors. The pan needs a drain line piped to a safe termination point, not just a hole in the floor.
Bonding and grounding matter more than many DIYers realize. The green ground screw on the heater must connect to the equipment grounding conductor in your electrical supply. If you have copper water lines serving as a grounding path elsewhere in the house, install a bonding jumper across any dielectric unions to maintain electrical continuity.
Seismic restraints are required in earthquake-prone zones (Seismic Design Categories D, E, and F). These typically involve two straps, one at the top third and one at the bottom third, anchored to studs or masonry.
Permits aren’t optional. Most jurisdictions require both electrical and plumbing permits for water heater replacement, even if you’re swapping like-for-like. Inspectors verify proper wire gauge, GFCI protection (if located in garages or unfinished basements per recent NEC updates), expansion tank installation, and T&P valve termination.
Common Installation Mistakes to Avoid
Most water heater failures trace back to installation errors, not manufacturing defects. Here’s what goes wrong and how to prevent it.
Undersized wire is the top electrical mistake. A 4500-watt element on a 240V circuit pulls 18.75 amps, seems fine for 15-amp wire, right? Wrong. Continuous loads require wire and breakers rated for 125% of the draw. That’s why these heaters need 30-amp circuits (23.4 amps minimum) with 10-gauge wire.
Reversed hot and cold connections happen more than you’d think. Double-check before filling the tank. Cold should have the shutoff valve: hot feeds the house.
Skipping the expansion tank in closed systems creates a ticking time bomb. As water heats and expands with nowhere to go, pressure climbs until the T&P valve weeps constantly or fittings start leaking. This damages the valve and shortens tank life.
Over-tightening fittings cracks nipples and housings. Pipe threads seal with 2–3 turns past hand-tight. If you’re wrenching hard enough to grunt, you’ve gone too far. When comparing gas water heater installation diagrams with electric versions, you’ll notice gas requires additional venting and combustion air considerations, but both share the same plumbing torque limits.
Forgetting to turn off power before filling the tank tops the “embarrassing and dangerous” list. Elements energized without water submersion burn out instantly and can crack, sometimes violently.
Ignoring sediment in old supply lines means debris flows into your new tank during first fill. Flush lines before connecting the heater, and remove aerators from nearby faucets for a few days while particulates clear.
Setting thermostats too high wastes energy and increases scalding risk. Most manufacturers ship units set to 140°F: 120°F is safer and adequate for most households. If you have a dishwasher without a booster heater, 130°F splits the difference.
Don’t skip the final pressure test. Fill the tank, check every connection for drips, then restore power and wait an hour. Recheck for leaks and verify hot water reaches fixtures. A small weep today becomes a flood tomorrow.