
Small kitchens don’t have to feel cramped or limiting. With the right design choices, a compact cooking space can be just as functional and attractive as sprawling chef’s kitchens found in million-dollar homes. The secret isn’t adding square footage, it’s working smarter with the inches already available. Whether dealing with a galley kitchen in a city apartment or a modest suburban cooking nook, thoughtful layout decisions, strategic storage, and a few optical tricks can transform tight quarters into an efficient, welcoming workspace. This guide walks through proven design strategies that squeeze maximum utility from minimal footprint.
Table of Contents
ToggleKey Takeaways
- Kitchen designs for small kitchens succeed when layout prioritizes workflow first—maintain a tight work triangle (4–6 feet between sink, stove, and refrigerator) and choose galley or L-shaped configurations that maximize efficiency in compact spaces.
- Light colors, monochromatic schemes, and layered lighting (ambient, task, and accent) make small kitchens feel 20–30% larger without adding actual square footage.
- Strategic storage solutions like pull-out shelves, ceiling-height cabinetry, and wall-mounted systems can reclaim the 30–40% of cabinet space typically wasted, doubling usable storage capacity.
- Counter-depth refrigerators and appropriately sized appliances (24-inch ranges, 18-inch dishwashers) maintain layout flow and prevent oversized units from crowding counters and blocking walkways.
- Multifunctional elements such as fold-down counters, rolling carts, and integrated cutting boards create temporary workspace and dining surfaces without permanently consuming floor space.
- A well-designed small kitchen outperforms poorly planned larger kitchens in resale value, as buyers increasingly prioritize functional, accessible design over sheer square footage.
Why Small Kitchen Design Matters More Than Ever
Housing trends continue shifting toward smaller footprints. Urban apartments, starter homes, and downsized living situations often feature kitchens measuring 70 square feet or less, roughly the size of a standard parking space. Poor design in these spaces creates bottlenecks during meal prep, wastes vertical real estate, and leads homeowners to eat out more often than they’d prefer.
Good small kitchen design addresses workflow first. The classic work triangle (sink, stove, refrigerator) still applies, but in tight quarters, the distances shrink to 4–6 feet per leg instead of the traditional 9 feet. This compression actually improves efficiency when executed correctly, reducing unnecessary steps during cooking.
Another factor: resale value. Buyers increasingly prioritize functional kitchens over sheer size. A well-designed 80-square-foot kitchen with smart storage and quality finishes will outperform a poorly planned 120-square-foot space with wasted corners and awkward layouts. Real estate appraisers take note of cabinet accessibility, counter space per linear foot, and lighting quality, all elements that matter more in small kitchens.
Smart Layout Strategies That Make Small Kitchens Feel Spacious
Layout choice directly impacts how cramped or open a small kitchen feels. Most compact kitchens work best with galley or L-shaped configurations, each offering distinct advantages depending on room dimensions and access points.
Galley and L-Shaped Configurations
Galley kitchens place cabinets and appliances along two parallel walls, creating a natural workflow corridor. For this layout to function well, maintain at least 42 inches of clearance between facing cabinets, 48 inches if two cooks will share the space regularly. This dimension allows cabinet doors and appliance doors to open without colliding. Galley kitchens excel in narrow rooms (8–10 feet wide) and naturally enforce the work triangle by positioning sink and stove on one side, refrigerator on the other.
One common mistake: extending galley runs too long without a terminating feature. After 12–15 feet, these kitchens start feeling like bowling alleys. Break up long galley walls with an open shelving section, a window, or a contrasting cabinet finish at the midpoint.
L-shaped layouts wrap two perpendicular walls and leave the third side open, which works well for kitchens opening into living areas. The corner created by an L-shaped layout typically measures 24 inches deep, prime real estate that standard cabinets waste. Install a lazy Susan (36-inch diameter models fit most base corners) or pull-out shelving systems designed for corner access. These mechanisms cost $150–$300 but reclaim 6–8 cubic feet of otherwise dead space.
Both layouts benefit from pushing major appliances to endpoints rather than centering them. Place the refrigerator at one end of the run and the range at the other, leaving continuous counter space between. This arrangement provides uninterrupted prep zones, critical when working with limited linear footage.
Color and Lighting Tricks to Visually Expand Your Kitchen
Paint and lighting won’t add actual square footage, but they dramatically alter perceived space. Kitchens with thoughtful color schemes and layered lighting feel 20–30% larger than identically sized rooms with poor execution.
Light cabinet colors reflect more ambient light than dark stains, making walls feel farther apart. White, pale gray, and soft warm neutrals work best. Skip pure white if the kitchen lacks natural light, it’ll read as dingy without adequate illumination. Instead, choose whites with slight warm undertones (look for paint chips labeled “linen white” or “swiss coffee”). These shades photograph well and complement stainless steel appliances without appearing cold.
For walls, extend the cabinet color or go one shade lighter. Contrasting wall colors visually chop up small kitchens. Monochromatic schemes, where cabinets, walls, and even ceiling share similar tones, blur boundaries and extend sight lines.
Lighting requires three layers in small kitchens: ambient (overall illumination), task (focused work zones), and accent (decorative or highlighting). Many older small kitchens rely on a single ceiling fixture, inadequate for detailed knife work or reading recipes.
Install under-cabinet LED strip lighting to eliminate shadows on countertops. These draw 6–12 watts per 4-foot run, produce minimal heat, and last 25,000+ hours. Position strips toward the front edge of upper cabinets, 2–3 inches back from the face frame. This placement avoids glare while maximizing work surface coverage.
For ambient light, consider replacing dated flush-mount fixtures with recessed LED cans (4-inch or 6-inch diameter). Space them every 4 feet on center to eliminate dark pockets. Dimmer switches add flexibility, helpful during early morning coffee runs or late-night snacking.
Glossy finishes amplify lighting effects. Semi-gloss or high-gloss cabinet paint reflects 35–45% more light than flat finishes. Glass-front upper cabinets or open shelving solutions add depth by revealing layers beyond the main wall plane. Even 8–12 inches of visual depth tricks the eye into perceiving more space.
Storage Solutions That Double Your Cabinet Space
Standard cabinetry wastes 30–40% of available volume through poor internal organization. Small kitchens can’t afford that inefficiency. Strategic upgrades reclaim hidden capacity without expanding the footprint.
Pull-out shelves convert deep base cabinets from black holes into accessible storage. Standard base cabinets run 24 inches deep, awkward for retrieving items pushed to the back. Installing pull-out shelves (available in 18- and 21-inch depths to fit most cabinet boxes) brings contents forward with a single motion. Expect to pay $40–$80 per shelf: installing four pull-outs in critical cabinets typically costs $200–$300 but delivers immediate quality-of-life improvements.
Drawer dividers and peg systems organize contents vertically rather than stacked. Instead of nesting pots and pans (requiring users to remove three items to reach the fourth), adjustable pegs position cookware upright. These systems fit most drawers 21 inches wide or larger and cost $30–$60 per drawer.
Many tiny house kitchens maximize vertical space with ceiling-height cabinetry. Standard uppers terminate at 36 inches above the countertop, leaving 12–18 inches of unused wall. Extending cabinets to within 6 inches of the ceiling adds 25–40% more storage. Use upper shelves for seasonal items, specialty appliances, or bulk dry goods, things accessed weekly rather than daily.
Toe-kick drawers use the 3.5-inch space beneath base cabinets. While shallow, these drawers hold cookie sheets, cutting boards, and serving platters that don’t fit elsewhere. Retrofit kits cost $60–$120 and require only basic carpentry skills.
Don’t overlook wall-mounted systems between the countertop and upper cabinets. Magnetic knife strips, hanging rail systems for utensils, and small floating shelves for oils and spices free up drawer and counter space. These solutions thrive in small kitchens where every horizontal surface counts.
Choosing the Right Appliances and Fixtures for Compact Kitchens
Appliance proportions make or break small kitchen design. Oversized units crowd counters and block walkways: undersized models frustrate users who outgrow capacity within months.
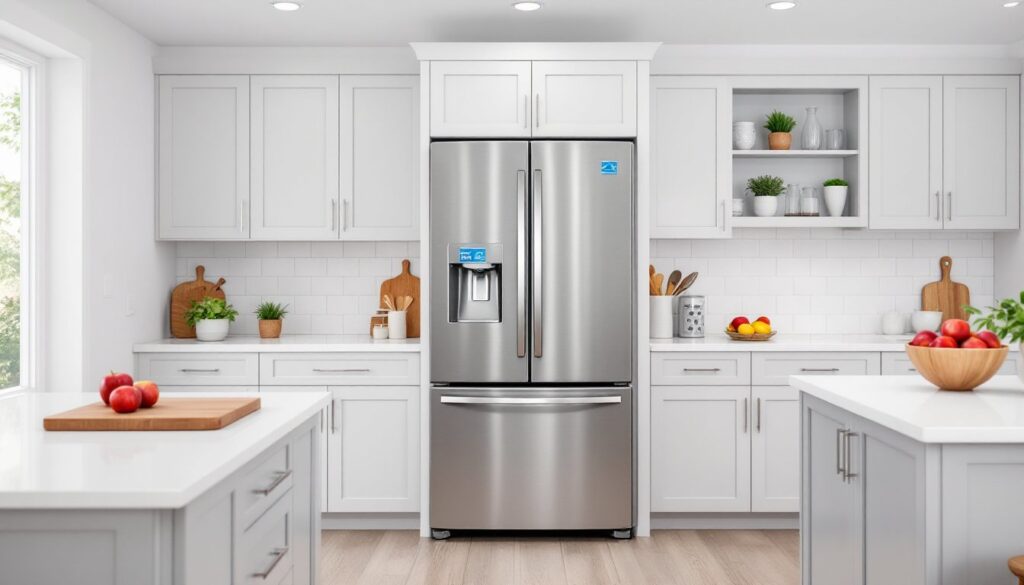
Refrigerators present the biggest footprint challenge. Standard-depth models (30–36 inches) protrude past typical 24-inch base cabinets, creating awkward bumps in the layout. Counter-depth refrigerators sit flush with cabinetry, improving flow in tight spaces. They sacrifice 2–4 cubic feet of capacity compared to standard models but eliminate the protruding obstacle. Expect to pay 15–25% more than standard-depth equivalents, worth it in kitchens under 100 square feet.
For extremely tight layouts, consider 24-inch-wide refrigerators (10–12 cubic feet). These fit spaces where 30-inch or 36-inch models won’t work. Some homeowners pair a compact refrigerator with an undercounter freezer drawer to separate fresh and frozen storage.
Ranges and cooktops come in 20-inch, 24-inch, and 30-inch widths. Most users find 24-inch ranges acceptable, they include four burners and a 3.0-cubic-foot oven, sufficient for households of 2–4 people. Apartment-sized 20-inch units exist but sacrifice oven capacity and burner power. Unless space is truly dire, stick with 24-inch minimum.
Induction cooktops offer advantages in small kitchens: they generate less ambient heat (important in confined spaces), clean easily (spills don’t bake onto glass surfaces), and shut off automatically when cookware is removed. Budget $600–$1,200 for a quality 24-inch induction unit.
Sinks and faucets require careful sizing. Undermount sinks (mounted beneath the countertop) simplify cleanup by allowing users to wipe debris directly into the basin without a raised rim catching crumbs. Choose sinks 15–18 inches front-to-back to preserve usable counter depth. Single-bowl sinks maximize basin size within compact overall dimensions, better for washing large pots and sheet pans than divided models.
Pull-down faucets with high-arc spouts (16–18 inches above counter) accommodate tall stockpots and make filling oversized items easier. Ensure adequate clearance between faucet and any overhead cabinets, at least 20 inches of vertical space. Resources like The Kitchn offer detailed appliance reviews for various kitchen sizes.
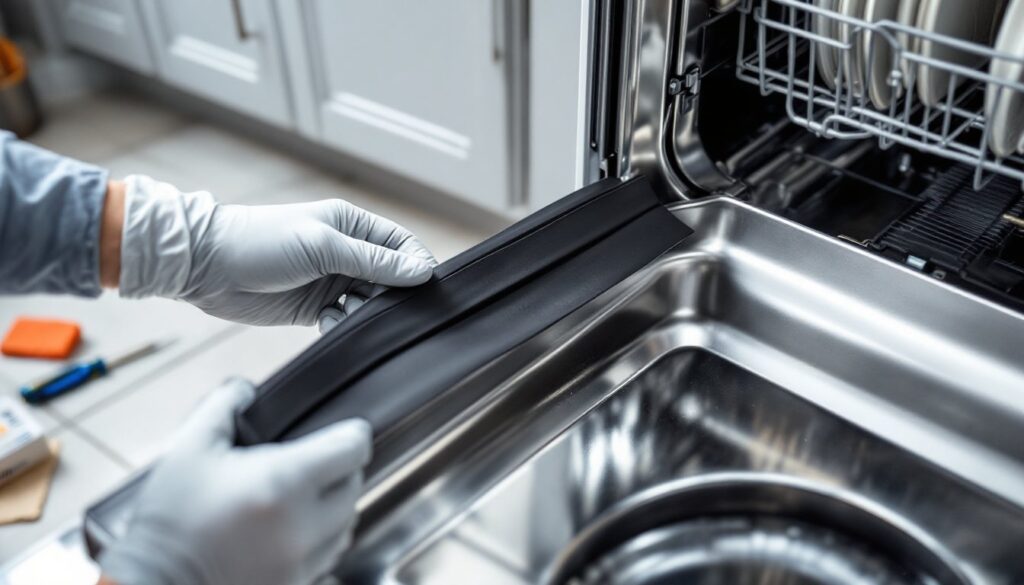
Dishwashers in 18-inch widths (vs. standard 24-inch) fit where full-size units won’t. They hold 6–8 place settings, adequate for couples or small families. Bosch, SPT, and Danby manufacture reliable 18-inch models priced between $500–$900.
Multifunctional Design Elements and Space-Saving Features
Small kitchens demand double-duty thinking. Every element should serve at least two purposes, surfaces fold, storage hides appliances, and fixtures pivot or extend when needed.
Drop-leaf tables or wall-mounted fold-down counters create temporary prep or dining surfaces. Install a 48×24-inch fold-down along a blank wall: when lowered, it provides an extra 8 square feet of workspace. When raised, it’s a 1.5-inch profile. Mount these to wall studs using heavy-duty hinges rated for 200+ pounds (expect $80–$150 for quality hardware). Pair with fold-away wall-mounted seating for casual dining without permanent chairs cluttering the floor.
Rolling carts with butcher block or stainless tops serve as mobile prep stations and extra storage. Units measuring 24×18 inches fit most kitchens and slip into corners or beside appliances when not needed. Choose models with locking casters to prevent drift during use. Prices range $100–$300 depending on materials.
Appliance garages, cabinets with tambour (roll-up) doors, hide toasters, blenders, and coffee makers without requiring full cabinet depth. These fit into standard upper cabinets and keep small appliances accessible yet out of sight. Retrofit kits cost $120–$200 and install in a weekend.
Pegboard or slat-wall systems mounted inside cabinet doors organize lids, measuring cups, and cutting boards vertically. This approach reclaims wasted vertical space inside cabinet boxes. Small space inspiration platforms like Apartment Therapy showcase hundreds of creative storage hacks.
Consider integrated cutting boards that slide over the sink, adding 12–18 inches of temporary prep space directly above the basin. These boards (sized to match sink dimensions) cost $40–$80 and prove invaluable when counter space runs short.
Visual inspiration galleries such as those found on Houzz’s small kitchen ideas page display real-world implementations of these strategies in dozens of layout variations. When planning multifunctional elements, measure twice: fold-down surfaces need clearance zones, rolling carts require turning radius, and appliance garages must account for cord management.
Finally, don’t neglect the potential of a modest DIY kitchen remodel, even weekend projects like installing pull-out shelves or upgrading lighting yield measurable improvements in functionality and comfort. Small doesn’t mean settling. It means designing with intention.